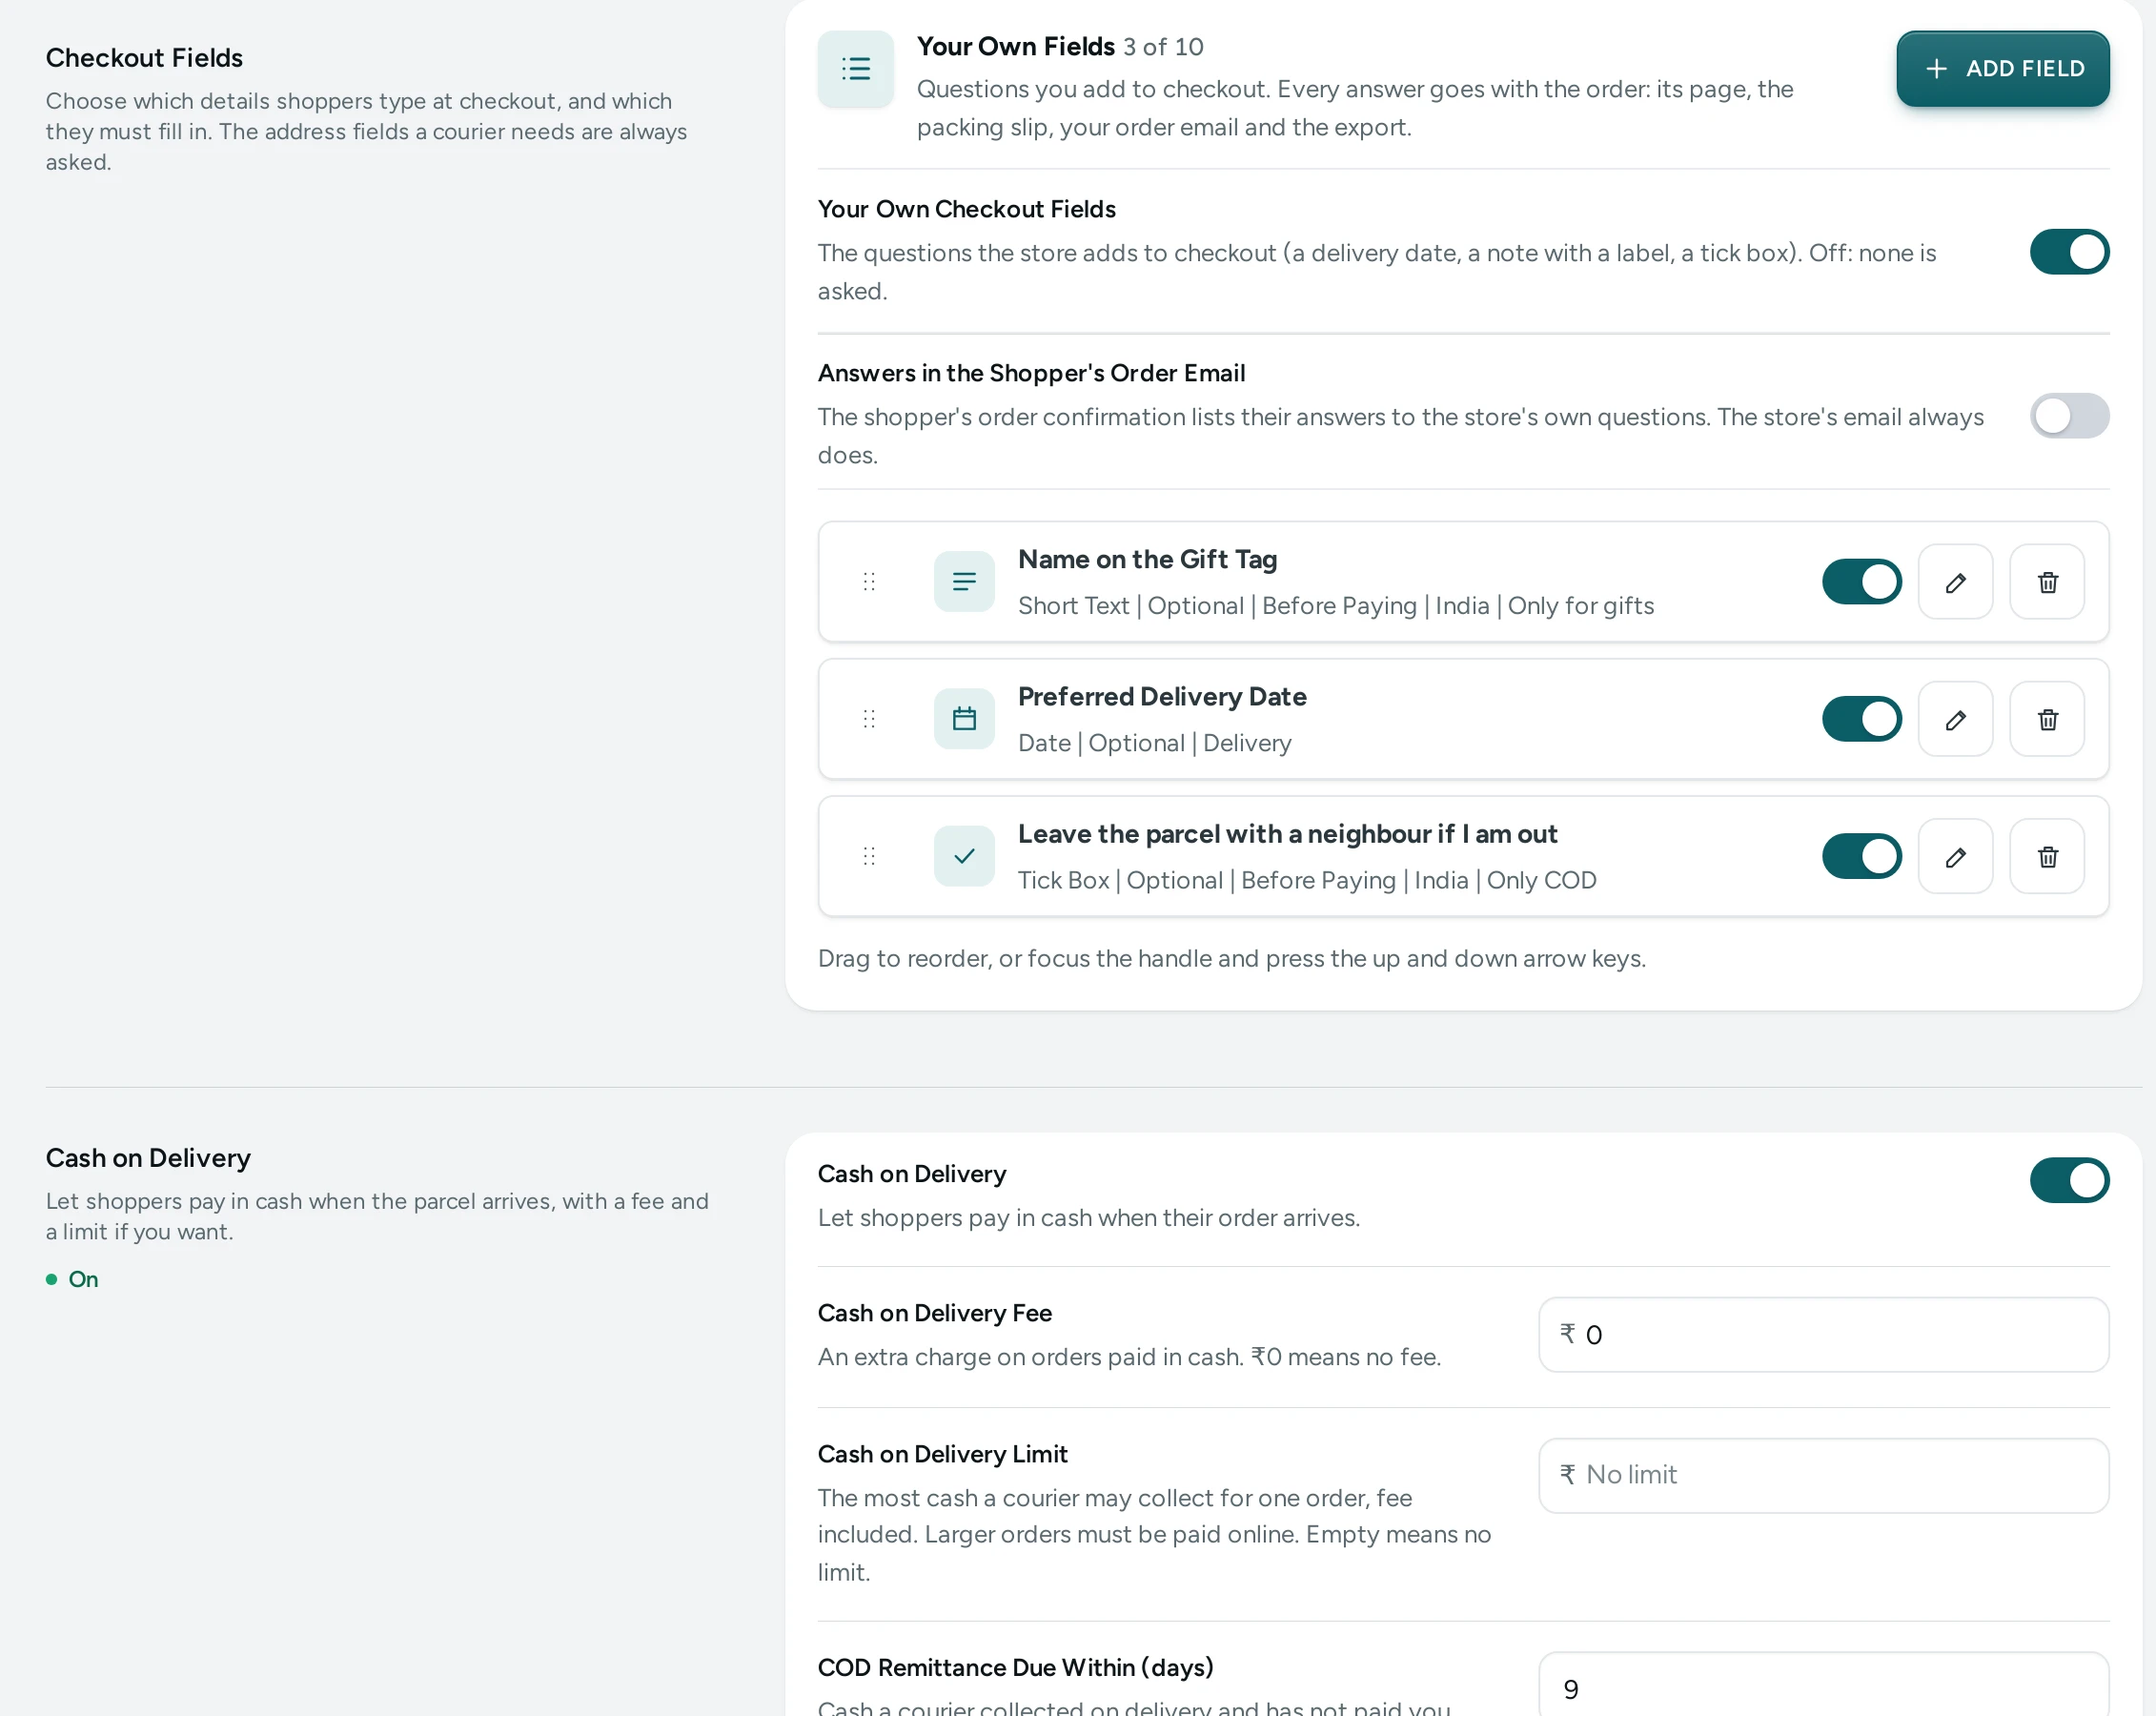
Your Own Fields lets you ask shoppers anything else your orders need at checkout: a preferred delivery date, a message for the card, a tick box for your terms, the size of a gift box. It sits on Settings › Checkout, under the Checkout Fields card. Anyone who can see settings can open it; adding and changing fields needs the right to change settings, which the store's owner and admins have.
Add a Field
- Open Settings › Checkout and scroll to Your Own Fields.
- Press ADD FIELD. A sheet opens with a preview at the top that changes as you type.
- Under Kind of Field, choose one of nine kinds:
- Short Text: one line, such as a name for the card (up to 200 characters unless you set another limit).
- Long Text: a few lines, such as delivery notes (up to 1,000 characters unless you set another limit).
- Number: a count or an amount, with an optional smallest and largest number.
- Dropdown: one choice from a list that opens. Type the choices one per line, at least two and at most 20.
- Radio Buttons: one choice with every option in view.
- Tick Box: a yes, such as "I agree to the delivery terms". Add Link words and a Link address (a page of your store such as
/pages/terms, or anhttps://address) and the words in the label become a link that opens in a new tab. - Date: a day, with the Earliest day and Latest day counted in days from today (India's time). 0 is today, 2 is the day after tomorrow.
- Phone Number and Email Address: checked as a phone number or an email address.
- Under Words, type the Label shoppers see, and if you like a Help text (shown under the field) and a Placeholder (shown inside the empty field).
- Under Answer, switch on Shoppers must answer to make it required. A required tick box must be ticked to place the order.
- Under Where It Shows, choose the Place in checkout: Contact (with the mobile number and email), Delivery (with the address) or Before Paying. Choose Which checkout: India and Abroad, India or Abroad (abroad is checkout for shoppers in your markets outside India).
- Under When It Is Asked, keep everything open to ask always, or narrow it down:
- Way of paying: Any, Only COD or Only Paid Online.
- Only when the order is a gift: the field shows inside the gift box once the shopper ticks "This order is a gift" (India's checkout).
- Only when the bag has a product from these categories (subcategories count too) or these collections.
- If your store offers other languages, open each one under Other Languages and type the label, help, link words and choices in it. A box left empty shows your own words.
- Press SAVE FIELD. The field is saved at once and shows on your checkout.
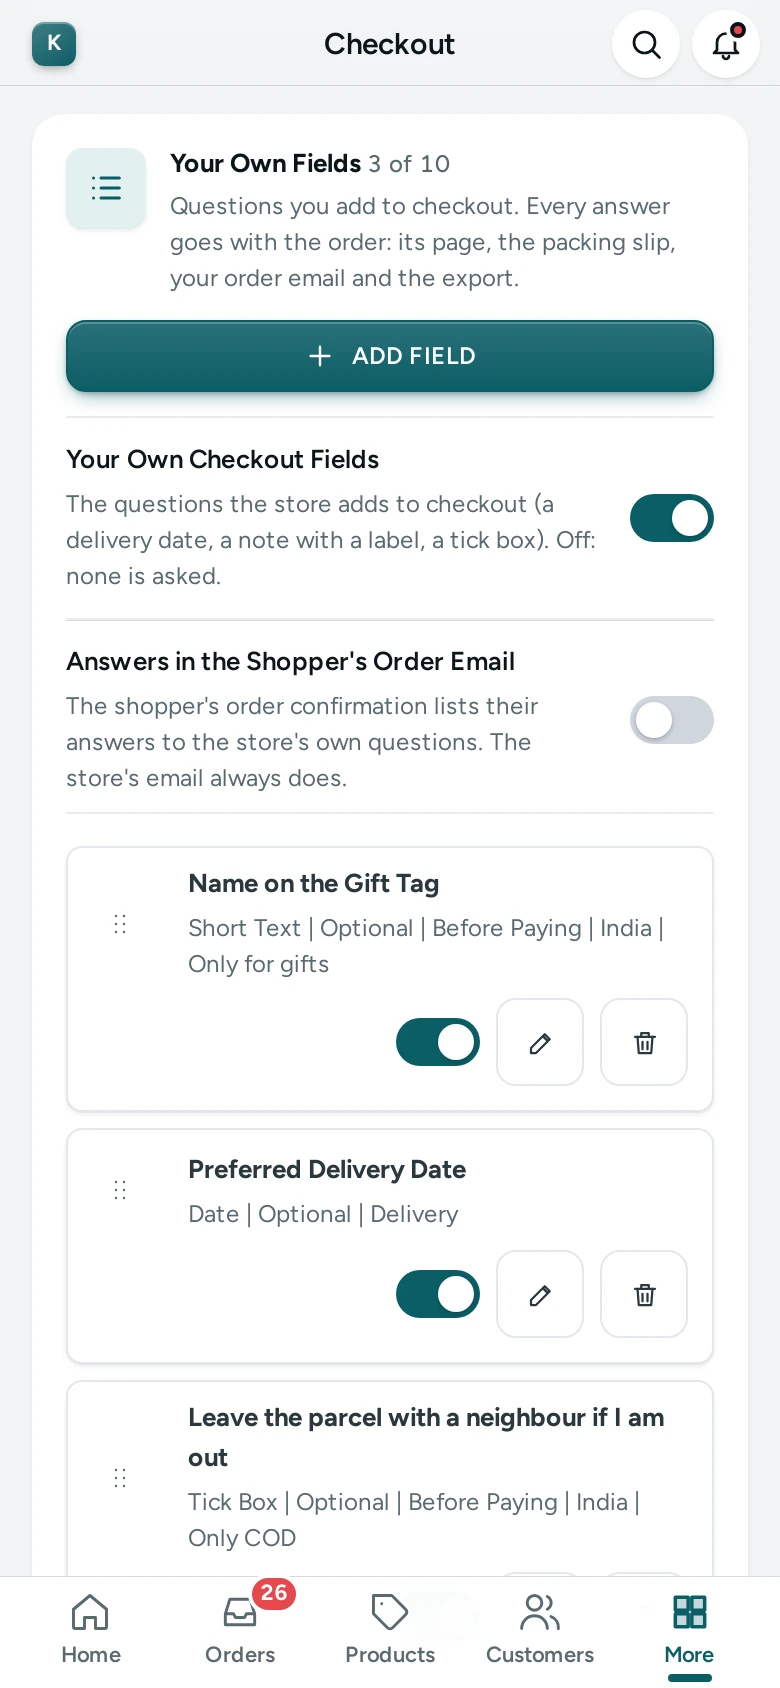
A store may have up to 10 fields of its own; the card shows how many you have, such as "3 of 10".
Change, Order, Switch Off and Delete
- Order: drag a row by its handle, or focus the handle and press the up and down arrow keys. The new order is saved at once and checkout follows it within each place.
- Switch: each row's switch turns that field off or on without deleting it.
- Edit: the pencil opens the same sheet. Orders already placed keep the label and answer they had.
- Delete: the bin deletes the field and shows UNDO for a few seconds; pressing it puts the field back with its place.
- Your own checkout fields (the switch above the list) turns all of them off or on at once. It is saved with the page's SAVE bar, like the other settings on the page.
What Shoppers See
Each field looks like the rest of your checkout, in your theme's fonts, colours and control shapes, and works on a phone: dates open the phone's calendar, phone numbers open the number pad. A field that is not required says "(Optional)" after its label. If a required field is empty or an answer is not right (too long, a date too soon, a number too large), the words show under the field when the shopper presses PLACE ORDER, and the cursor moves there. Mercayo's server checks every answer again when the order is placed, so no order gets past a required field.
Answers typed before the page has finished loading, or before a slip of the phone's Back button, are kept.
Where the Answers Go
Every answer travels with the order, with the label it had when the order was placed:
- the order's page in your admin, in a Checkout Answers card, and the order in the phone app;
- the packing slip and the printed packing list, so the packer sees them;
- your new-order email; the shopper's order confirmation too if you switch on Answers in the shopper's order email;
- the orders CSV, one column per question (phone and email answers only for staff who may export customers' contact details);
- the orders search: typing a text or choice answer finds the order.
Orders your team makes in Orders › Create Order have a Checkout Questions card where staff can fill the same fields; nothing is required of staff. Editing an order starts with its answers.
Mercayo's Override
Mercayo can switch your own checkout fields off for one store, or change how many fields it may have, with a reason that your admin shows beside the locked setting.