The Product Designer lets shoppers design a product themselves on a live picture of it: their photos and words, straight or curved, your art and Mercayo's starter art, shapes and QR codes, on every side you set up. They can start from a template you made, save their design and share it. You download a print-ready PDF and PNG for each print area from the order.
It is a paid add-on on every plan: ₹799 a month or ₹7,670 a year, plus 18% GST. Your first 14 days are free.
Start the Free Trial
- Open Settings › Plan and Billing. Under Add-ons, find the Product Designer card.
- Press START 14-DAY FREE TRIAL. The designer works at once; nothing is charged for the trial.
- To keep it, press ADD PRODUCT DESIGNER before the trial ends. You pay only from the trial's end.
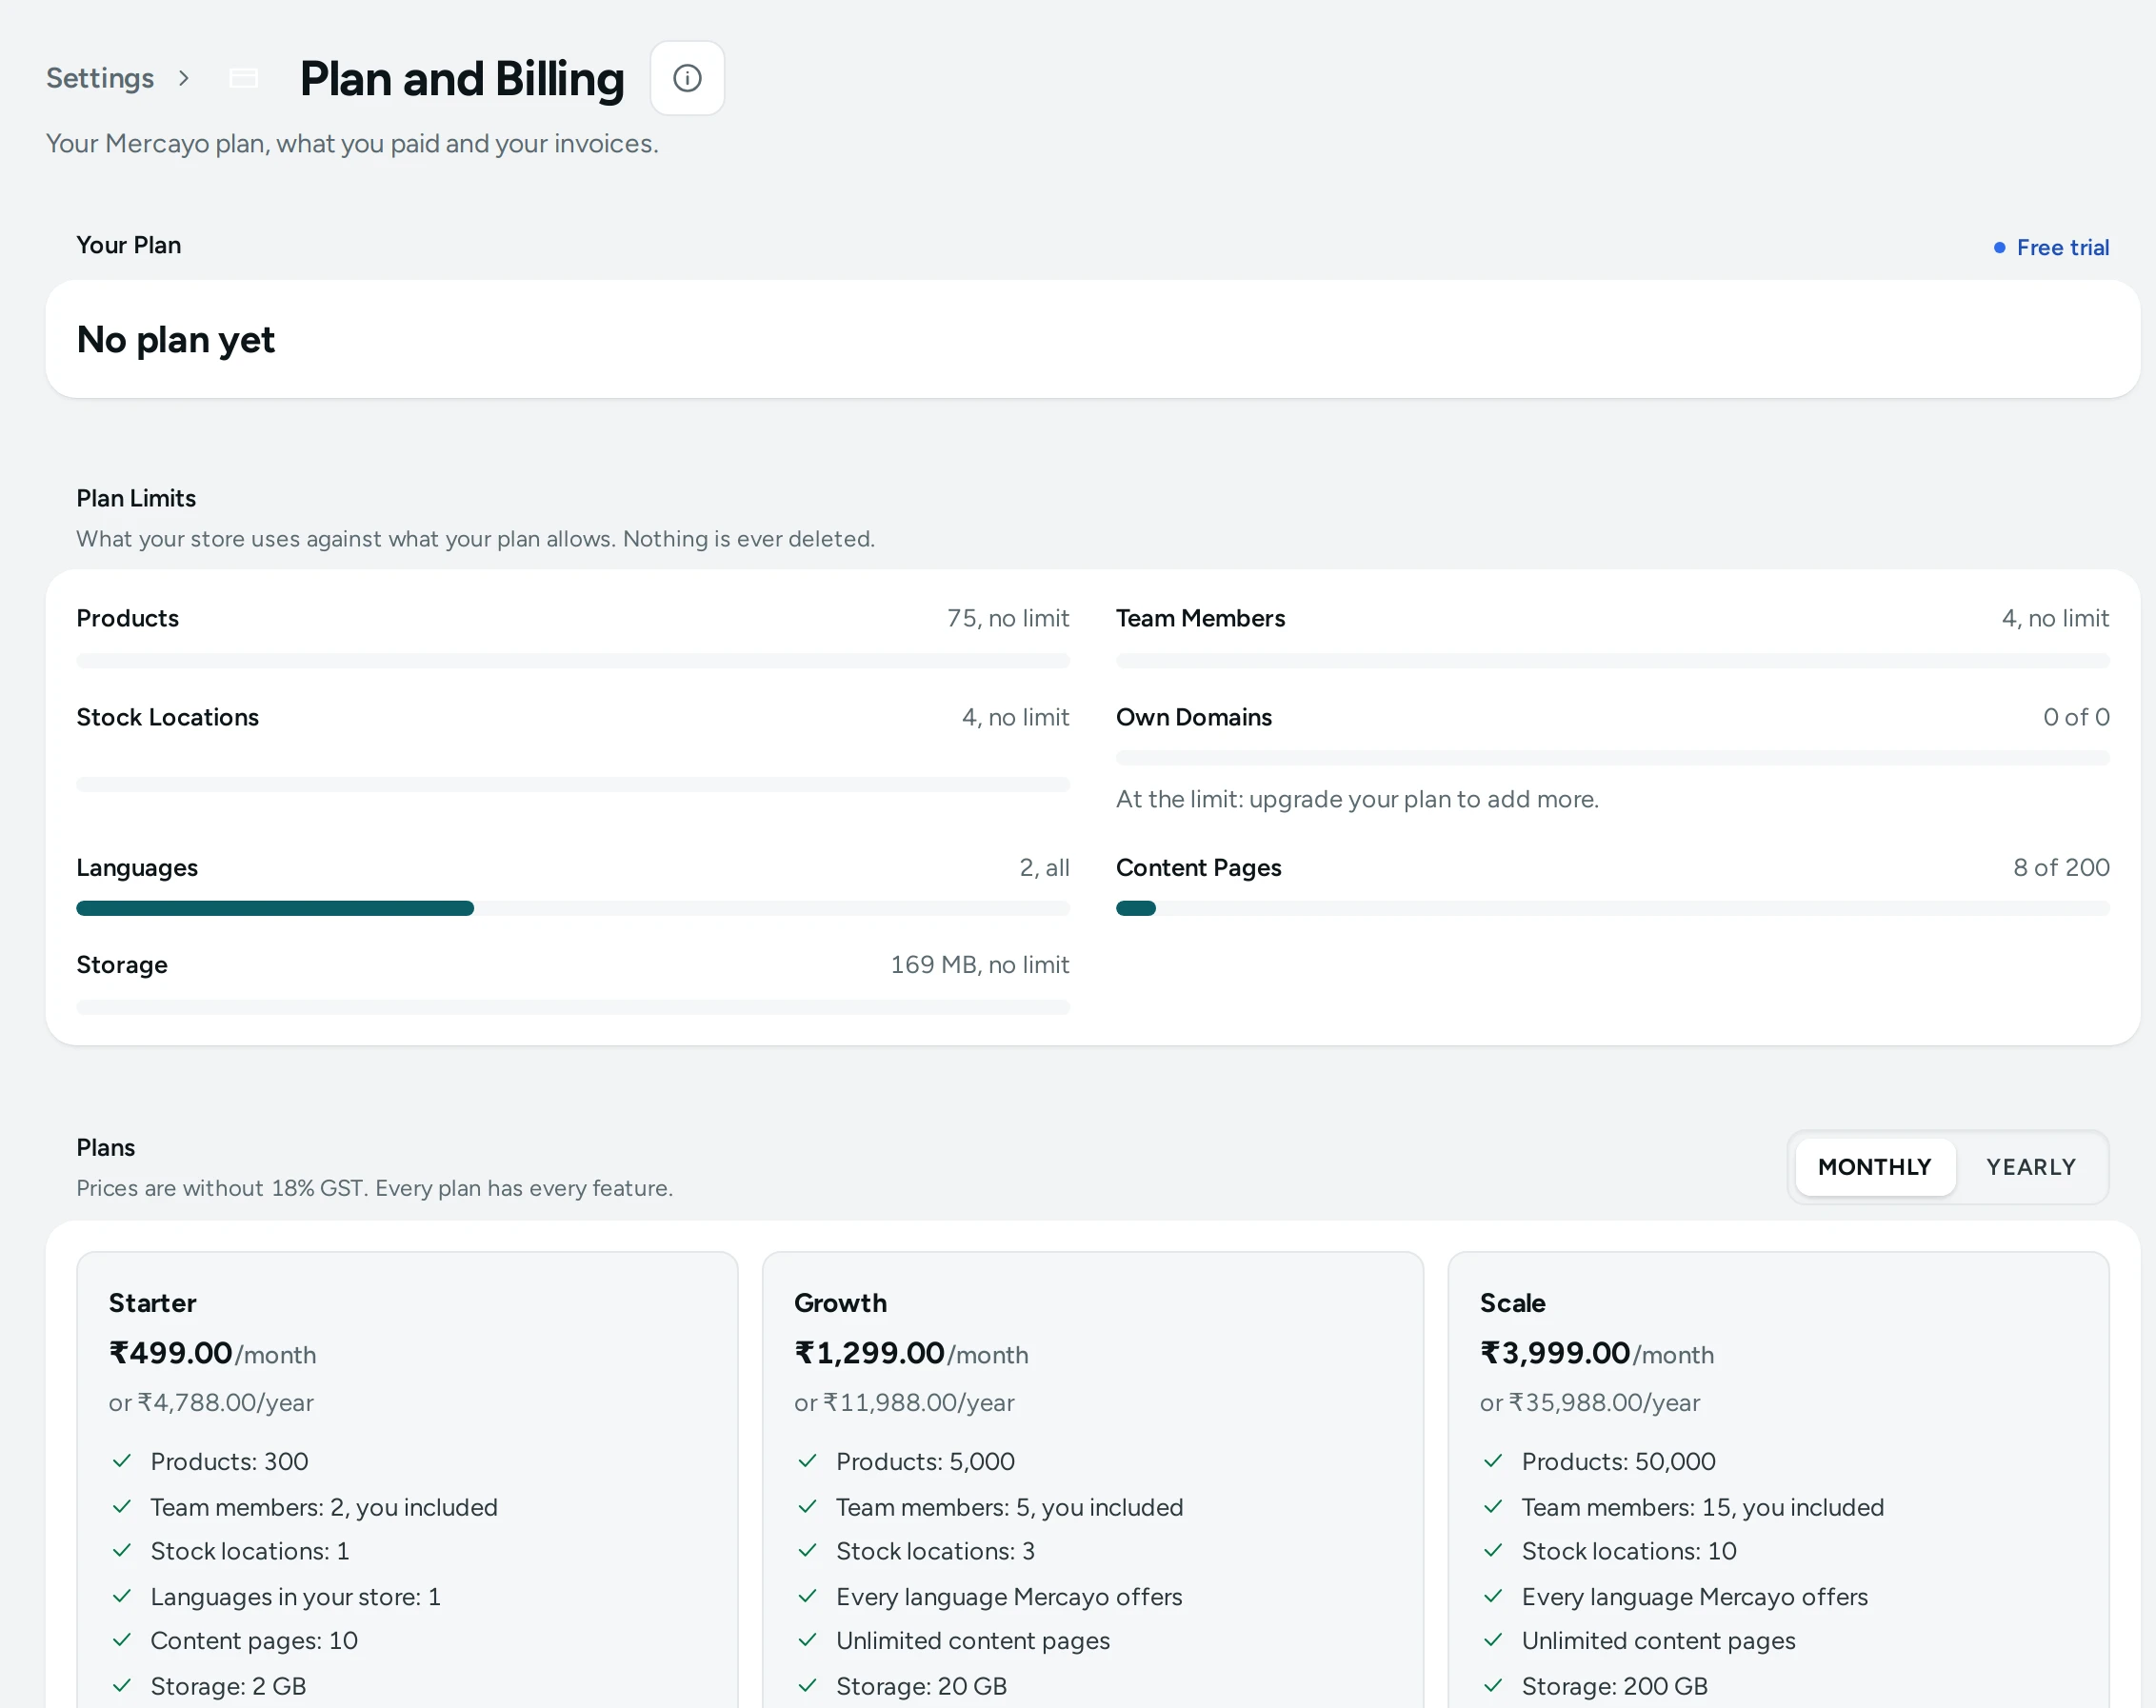
If the trial ends without it, the designer is hidden from shoppers. Nothing is deleted: your sides, print areas, fonts, art, palettes, templates and price rules are kept, and orders already placed keep their print files. Add it at any time to switch it back on. See Plans and Billing for how trials of add-ons work.
Before You Start
- The product needs a photo of each side to design on (a plain front, a back, a sleeve). Add them on the product's page like any photo. For colours or models, add a photo of each, or tint one.
- Know the real size of each place you can print and the print quality your printer wants (300 DPI is usual).
Choose the Fonts
- Open Products › Product Options › Designer Library.
- Under Free Font Library, press ADD beside each font shoppers may use. Filter by Hindi for fonts that write Hindi too.
- Your own fonts from Online Store › Theme › Typography are under Your Own Fonts.
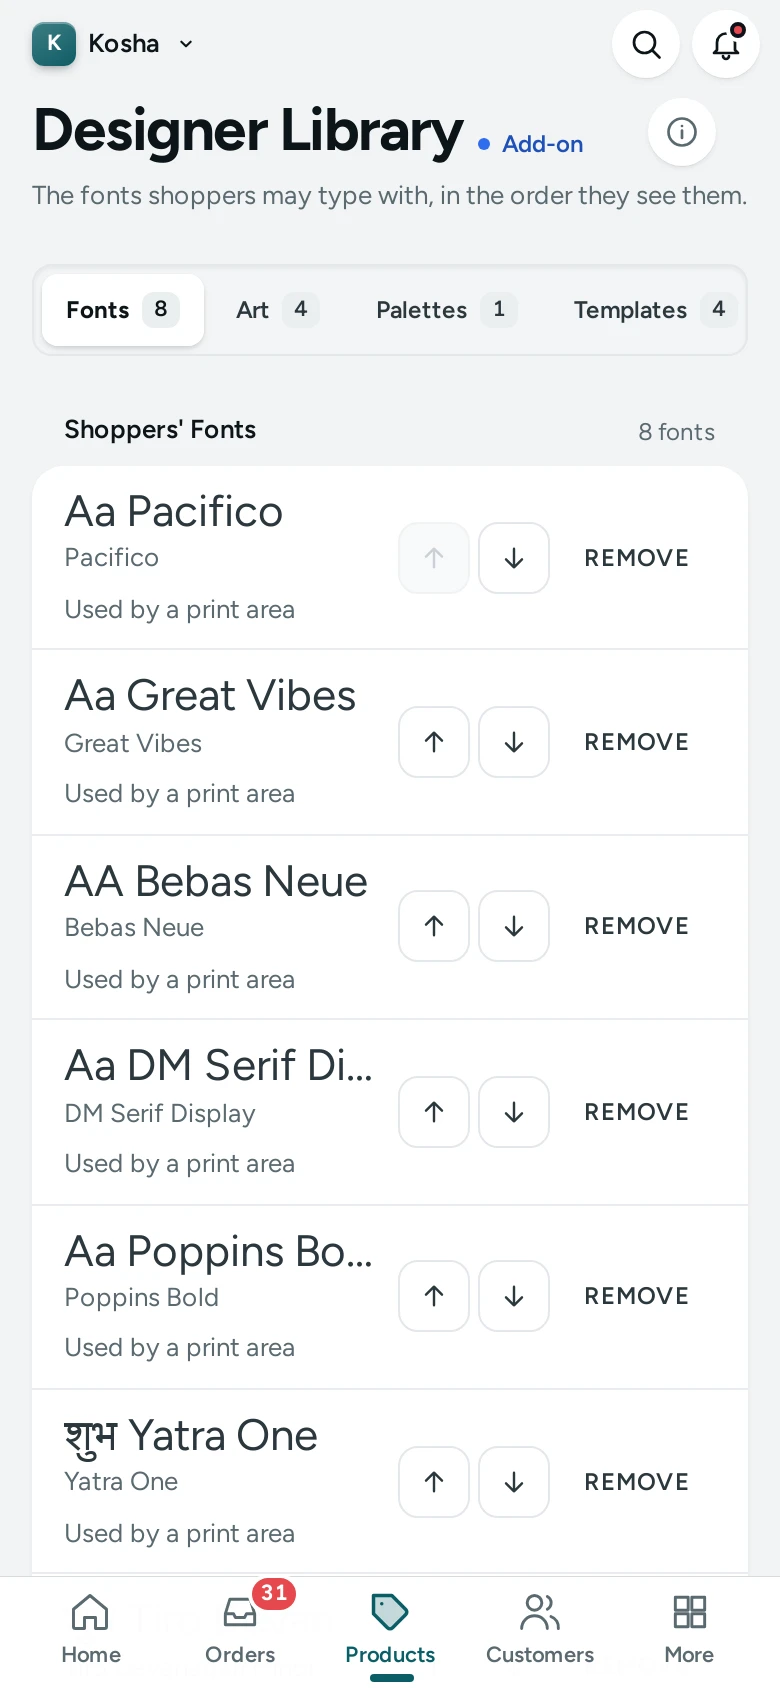
- Move them up or down to set their order, then SAVE.
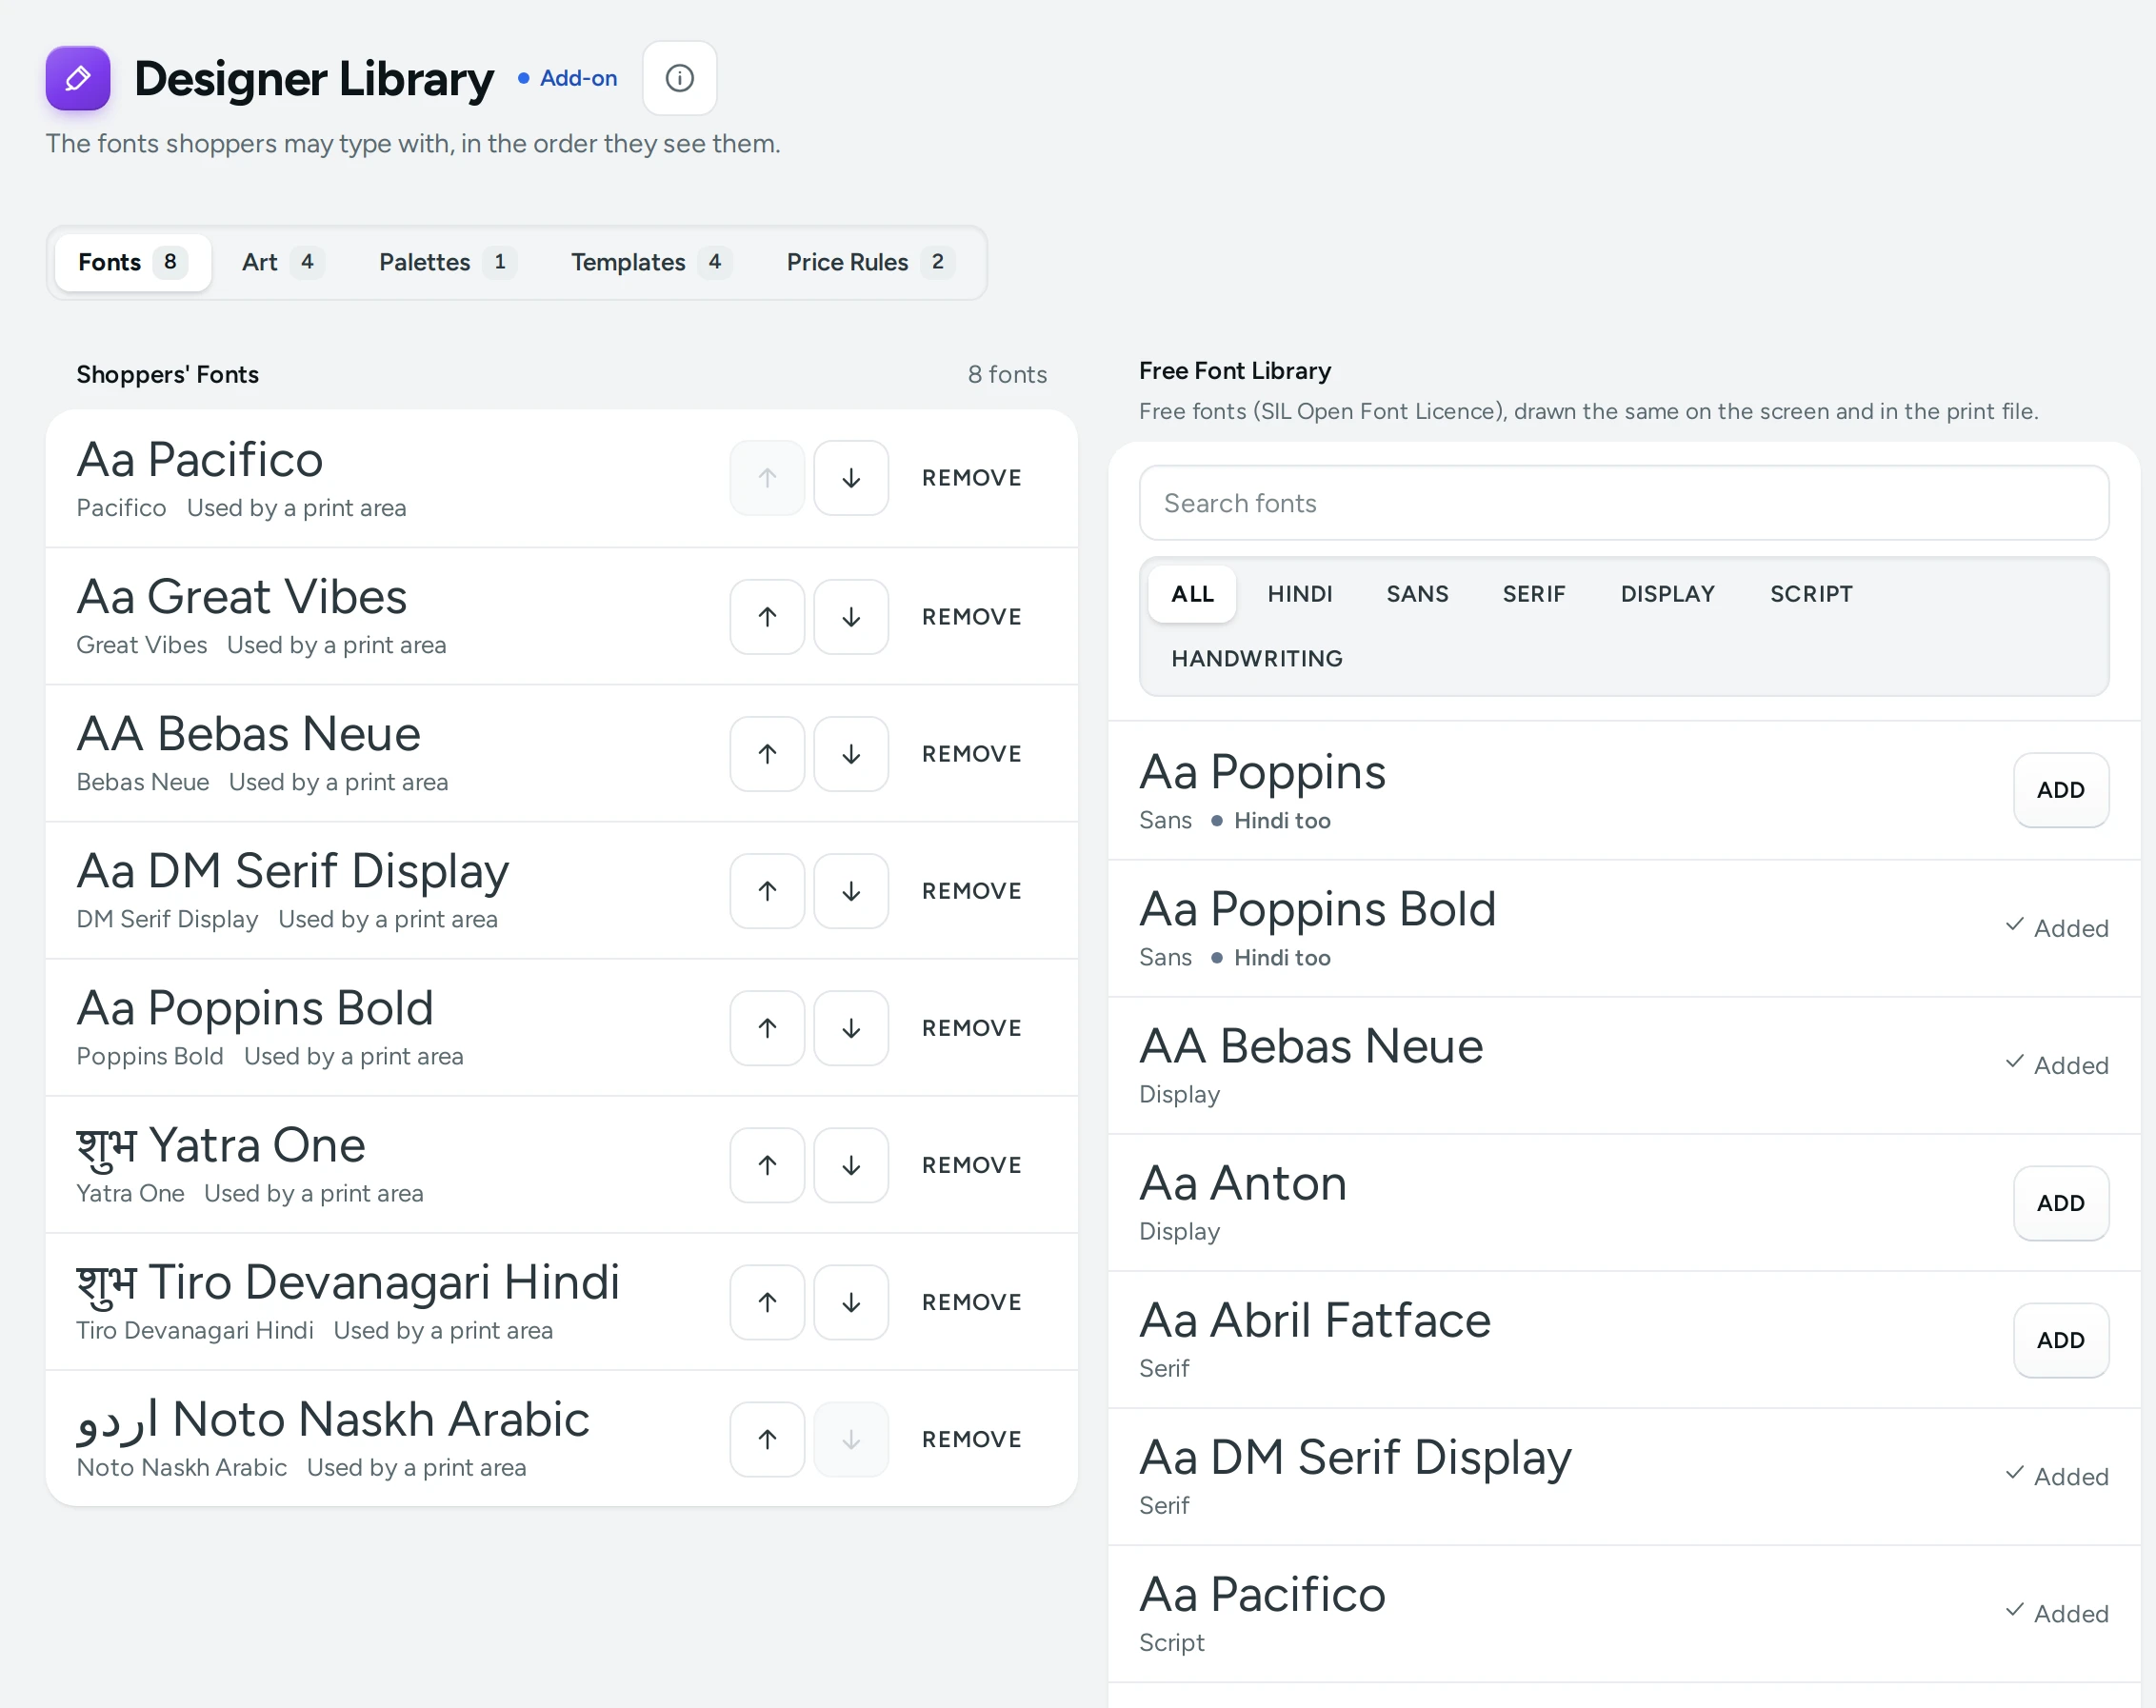
The Designer Library also holds your art, palettes, templates and price rules.
Set Up a Product
- Open the product. On the Product Designer card, press SET UP DESIGNER.
- Press ADD SIDE. The side starts with the product's first photo; press REPLACE under Base Photo to choose another, and ADD under Overlay for a picture shown above the design (a camera ring, a fold).
- Choose the area's shape, then drag on the photo where printing can go. Drag the corners to fit.
- In Print Area, give it a name ("Chest"), its Real Size, the Print Quality, the Bleed and Safe Margin, and At the Edge:
- Cut at the Edge: designs may run past the line; the print stops at it.
- Keep Inside: everything must sit inside the line before the bag.
- Choose what Shoppers Can Add (text, photos, art, shapes, QR codes), Colours (any, a list of your own, or a palette), a colour limit, Fonts, Text Limits and the Lowest Photo Quality.
- Set the Price When Used: it is added once when anything is placed in that area.
- For a product with colours or models, use Photos by Colour (or by Model, by any option) to choose each value's photo or tint it from another. A side's photo comes from the first value with a photo of its own and its tint from a value with a tint, so a phone model's photo can be tinted by the colour chosen.
- Press SAVE. PREVIEW AS SHOPPER opens the store's designer in a new tab.
On a phone, the print area's settings are grouped in rows; tap one to open its sheet.
Switch on Only Sold Designed if the product can only be bought with a design: its ADD TO BAG then opens the designer.
Print Areas in Any Shape
An area can be a rectangle, an oval, a preset or your own outline:
- Presets: a rounded rectangle, a circle, a heart, a star, a hexagon, an arch, and a phone's back with its camera cut-out. Each is drawn to the area's size.
- Your own outline: straight lines and curves inside the print area (an SVG path). An outline that is not right (outside the area, or with anything but lines and curves) is refused with that reason; a preset is the easy way to a curve.
Keep Inside checks each element against the real outline, so nothing can sit over a camera hole.
Palettes and a Colour Limit
For screen printing, or a brand's own colours:
- In the Designer Library, open Palettes and add one: a name ("Brand Colours") and up to 24 colours, each with a name. A store keeps up to 40 palettes.
- In a print area's Colours, choose the palette. Change the palette once and every area using it follows.
- Set a colour limit (1 to 12) to cap how many colours a shopper may use on that side. A design with more cannot go in the bag until it uses fewer.
Changing a palette later. When you take a colour out of a palette (or give an area another palette or a lower colour limit), SAVE first lists the active templates that use it, with the colours they would lose:
- KEEP AS THEY ARE saves. Shoppers can still start from those templates: the parts a template locks keep their own colours. A part shoppers may change needs one of the colours offered before it goes in the bag.
- UPDATE TEMPLATES saves and moves each of those colours to the nearest one you still offer. A template's picture keeps the old colours until you open and save the template.
- BACK saves nothing.
What Shoppers Do
- On the product page they press DESIGN YOURS, or pick a design under Start From a Design.
- They add text (font, colour, curve, outline and shadow), photos (crop, filter), art, shapes and QR codes. A meter shows whether each photo is sharp enough at the size it will print, and a ruler shows real sizes.
- They move, size and turn things with a finger, use Layers, Undo and Redo. Their design is kept on their device; SAVE DESIGN keeps it in their account or as a link (see Saved Designs and Share Links).
- CHECK AND ADD shows each side, the checks and the price. They tick that they checked the spelling, colours and placement (you can turn this off in Settings), then ADD TO BAG.
- In the bag, EDIT DESIGN reopens the design; UPDATE BAG replaces the line.
Download the Print Files
Once the order is paid, or its cash on delivery is taken, Mercayo makes the files (usually within a minute or two).
- Open the order. The Print Files card shows each designed item and its sides.
- Press DOWNLOAD PRINT FILE for the PDF (the print area plus its bleed, text as real fonts), or the PNG at the area's DPI.
- Checked Before Printing lists the lowest photo quality, whether anything sits outside a Keep Inside area, and when the shopper ticked.
- Original Photos downloads the shopper's photos as they sent them.
A file that could not be made shows Failed with RETRY. Each download is written in the order's history. The order emails show a picture of each designed side (made from the design's preview, never the shopper's original photo), and the packing slip and the PDF packing list show them under the item.
Settings
In Settings › Product page › Product Designer:
- Product Designer: switch the designer off for the whole store (each product keeps its setup).
- Shoppers Tick They Checked: the shopper's tick before the bag.
- Lowest Photo Quality and Photo Size: where new print areas start, and the biggest photo a shopper may add.
- Starter Art: Mercayo's 24 starter pieces beside your own art.
- Share Links: whether shoppers may make read-only links to their designs.
Good to Know
- Print files are kept 180 days after the order is delivered; the small pictures stay with the order.
- Files are sRGB. Text in your own uploaded fonts prints as outlines (sharp at any size); the library's fonts are embedded.
- Names and numbers for team kits: Names and Numbers. Posters sized by the shopper, templates in each language and background cut-outs: Sizes and Languages. Printing many orders: Print Queue.
- New to the designer? Sell Products Your Shoppers Design: Step by Step walks one product from start to its first printed order.
Questions
Does it cost extra per order?
No. The add-on's price is the same whatever the number of designed orders, and print files are made on Mercayo's servers at no extra charge.
Can I try it before the trial?
Yes. On Mercayo's demo stores, Kosha's Heirloom Print Case and Saanjh's Classic Crew Tee open the designer as your shoppers would see it.