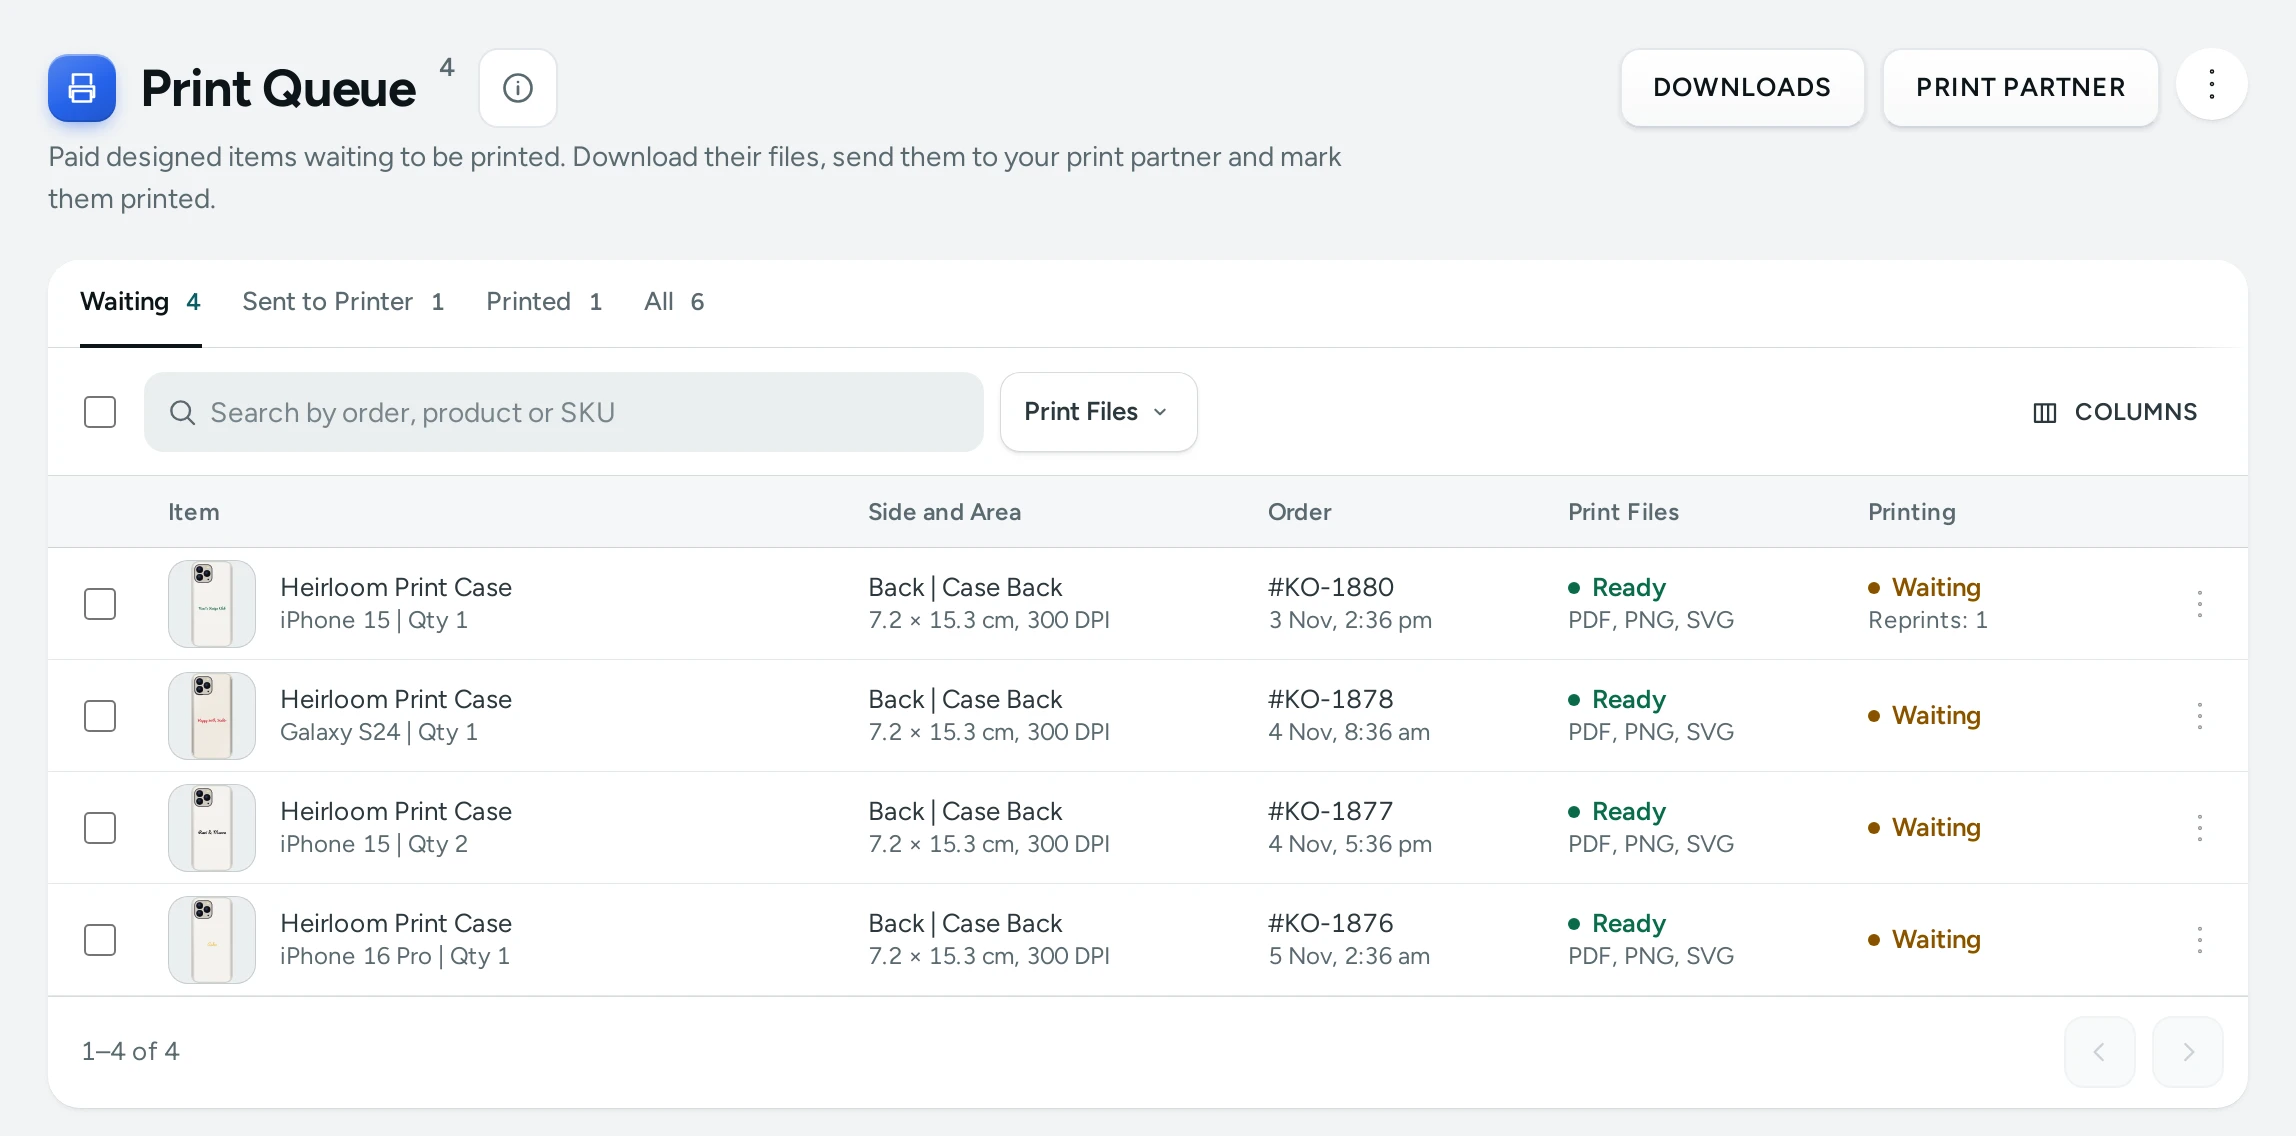
The Print Queue lists the print files of every designed item your shoppers have paid for, so the people who print work from one screen. It is part of the Product Designer, a paid add-on on every plan with a 14-day free trial. Open it from Orders › Print Queue. The menu shows how many print files are waiting.
What Is in It
A print file is one side's print area of one item: a T-shirt with a design on the front and the back is two print files (often printed on different machines). Each is made once the order is paid, or its cash on delivery is taken. Each row shows:
- the side's picture, the product, its variant and quantity;
- the side and the area ("Front | Chest") with its real size and DPI;
- the order's number and when it was placed;
- whether its files are Ready, Being Made or Failed (a photo below the area's lowest DPI says so);
- where it is in printing: Waiting, Sent to Printer, Sent to Partner or Printed, and how many times it was sent back to print again.
Orders that are cancelled or returned leave the queue.
Batches and Filters
- Batches at the top: one tile for each product, or for each print area with Group By › Print Area. Press a tile to see only that batch; press it again to see all.
- The tabs: Waiting, Sent to Printer, Printed and All, each with its count.
- Search by the order's number, the product's name or its SKU.
- Print Files › Ready or Not Ready Yet.
Mark Them Printed
- Tick the print files (on a phone, press and hold one).
- Press MARK PRINTED, or SENT TO PRINTER when they have gone to your printer.
- The message has UNDO for a few seconds: it puts back exactly what you changed, unless someone changed them since.
Each change is written in its order's history.
Print Again
From Sent to Printer or Printed, tick the files, open the bar's menu and press REPRINT. Say why ("The ink smudged"): they go back to Waiting with your reason and their reprint count. Files that were removed after their keeping are made again first.
Download Them as a ZIP
- Tick the files (the box at the top ticks the whole page).
- In the bar's menu, press DOWNLOAD ZIP.
- Choose the files: PDF With Bleed, PNG at Print Size, SVG of the Layers and, when your store makes them, PDF in CMYK. Press MAKE ZIP.
The ZIP is made in the background, so you can keep working: Downloads shows its progress, and the bell tells you when it is ready ("Print files ready (24 of 24)"). Inside, each file is under its order's number ("ko-1042/studio-tee-front-chest.pdf"), with a manifest.csv listing each item, side, area, real size and DPI. A big download comes in parts of up to 45 MB. Each ZIP is kept for 7 days.
The Files
| File | What It Is |
|---|---|
| PDF With Bleed | The print area with its bleed, text as real fonts, photos at their full quality. With Crop Marks in the PDF on, the page has trim marks outside the bleed. |
| PNG at Print Size | The print area at its DPI on a clear background, for DTG and sublimation printers. |
| SVG of the Layers | One layer for each text or photo (text as outlines), and a hidden Trim and Bleed guide, for a print shop that edits in Illustrator or Inkscape. |
| PDF in CMYK | The print area with its bleed as one CMYK picture at the area's DPI, converted through your print profile and naming it in the file, for an offset or CMYK press. Text is pixels in this file. |
Turn crop marks, the SVG and the CMYK PDF on or off in Settings › Product Page › Product Designer (Crop Marks in the PDF and CMYK PDF for Printing are off at first, SVG of the Layers on). They apply to files made from then on. How to set up the CMYK PDF and its profile: 3D View and CMYK Print Files.
Send Them to Your Print Partner
If a print shop prints for you, set it up once in Print Queue › PRINT PARTNER:
- Give its Name, and its Email, its Webhook Address, or both.
- Choose the Files to Send (PDF, PNG, SVG, PDF in CMYK).
- Press SAVE. For a webhook, copy the signing secret shown and give it to your partner: it is shown only once (NEW SECRET makes another).
- Press SEND TEST: the Delivery Log shows whether it arrived.
Then, on the Print Queue, tick files and press SEND TO your partner. Or switch on Send When Paid: once every print file of a paid order is made, it goes to your partner by itself. Delivered files show Sent to Partner.
- By email, your partner gets each item with its order number, product, side, area, size and DPI, and its files as links.
- By webhook, their system gets the same as JSON, signed in the Standard Webhooks format (the headers webhook-id, webhook-timestamp and webhook-signature), so they can check it came from you.
- The links work for 7 days. They never show your shopper's name, phone, email or address.
- A webhook that does not answer is tried again: after 1 minute, 5 minutes, 15 minutes, 1 hour, 4 hours and twice after 12 hours. The log shows each try and its answer.
Who Can Use It
Two rights in Settings › Staff and Roles: View Print Queue (see it, download files and ZIPs) and Manage Print Queue (mark, reprint, send to the partner). The Order Manager role has both. Setting up the print partner needs Change Settings.